Pazu Netflix Video Downloader
1.8.2
Pazu Netflix Video Downloader helps you download any Netflix movies and TV shows to 1080p MP4/MKV on your Windows so you can transfer and play them anywhere you want without Netflix app or browser.
Size
165.6 MBVersion
1.8.2
165.6 MBVersion
1.8.2
Report this app
Description
Pazu Netflix Video Downloader Overview
Pazu Netflix Video Downloader helps you download any Netflix movies and TV shows to 1080p MP4/MKV on your Windows so you can transfer and play them anywhere you want without Netflix app or browser.
Features of Pazu Netflix Video Downloader
- Netflix Anywhere
Watch Netflix movies & TV shows offline, anywhere. - 1080P
Download Netflix in HD with a 1080p resolution. - Audio & subtitles
Download Netflix video with any audio and subtitles you want. - Multilingual interface
English, Deutsch, Español, Français, 日本語, 简体中文 - Download Netflix Video with High Quality
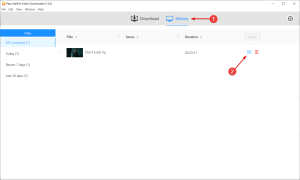
Search by name or directly copy and paste the link of videos to download from Netflix. Allow you to select the video quality for downloaded TV shows and movies from Low (240P) to High (720P/1080P) that best fits your needs.- Easy & fast downloading
- Downloaded videos will never expire.
- High quality, up to 1080p depending on the TV show or movie, requires more storage space
- Preserve Multilingual Audio and Subtitles
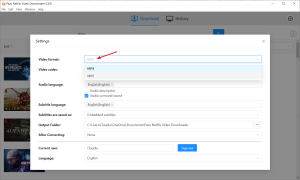
Netflix shows the 5-7 most relevant languages based on your location and language settings. However, Netflix only shows the 2 most relevant languages for downloads. With Pazu Netflix Video Downloader for Windows, you can download movies and TV shows with any Audio and Subtitles you want.- Keep Audio description and Audio surround sound
- Save subtitles as Embeded subtitles, Independent subtitles or Hardcoded subtitles.
- Keep Audio tracks and Subtitles in multiple languages: English, Deutsch, Español, Français, 日本語, 简体中文, etc..
System Requirements for Pazu Netflix Video Downloader
RAM: 2 GB
Operating System: Windows 7, Windows 8, Windows 10, and Windows 11
Space Required: 200 MB
What's new
- Official site does not provide any info about changes in this version
Images
Best version so far, works great!. Thank you AppDoze for your hard work.
I hope there will be 1.6.9 update, 1.6.8 can’t download subtitles
will update it soon 🙂
I did the first download but then it just stops sometimes at 10% sometimes at 14%
try in some other browser buddy
No no I meant downloading inside the Pazu. I downd the app it’s ok.
add streamfab or any Netflix downloader for android apk mod plz
There isn’t any Netflix downloader available for android. I will upload it if its available anytime in future