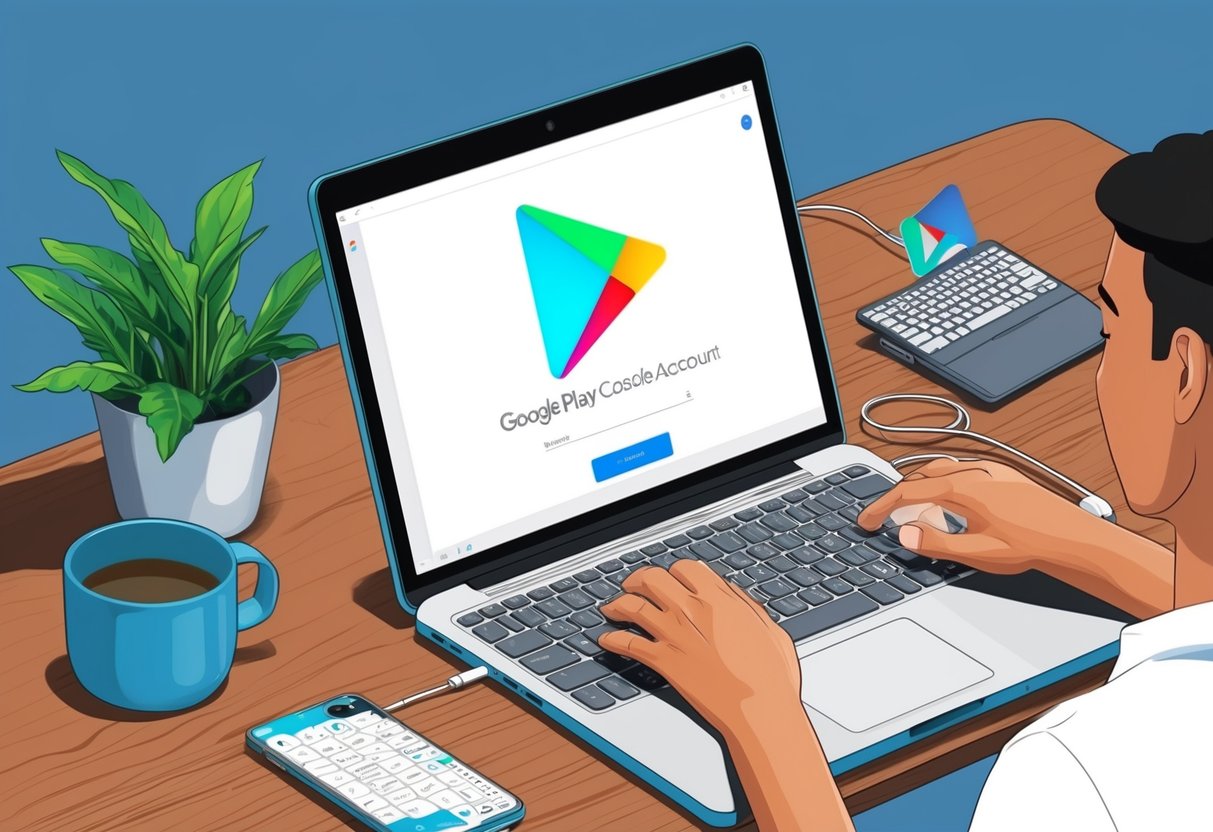
If you want to publish Android apps on the Google Play Store, the first thing you need is a Google Play Console account. This account gives you access to all the tools and features you need to upload, manage, and monitor your apps. Whether you’re a beginner or have some experience, learning how to create a Google Play Console account is the first and most important step in your app development journey.
The Google Play Console is the official platform by Google that lets you control your app’s presence on the Play Store. Once you sign up and complete your registration, you can upload APK or AAB files, set your app’s price, manage updates, and track user reviews and performance statistics. It also gives you access to testing tools, crash reports, and monetization features.
Having a Google Play Developer Account is required for anyone who wants to publish apps. This guide will help you understand how to create a Google Play Console account step by step. It includes instructions for individuals as well as businesses or organizations. Many people also ask how to create a Google Play Developer account for free and if it’s possible to avoid any payment. Some of you may want to know how to create a Google Play Console account for an organization or what steps are needed to add other account types like a service account or merchant account and what’s the cost. You will find all these answers in this guide.
What is a Google Play Console Account?
A Google Play Console account is the account you need if you want to publish apps on the Google Play Store. It acts like your control panel where you can upload your Android apps, make updates, check how your apps are performing, respond to reviews, and manage payments if you are selling paid apps or using in-app purchases. Without this account, you cannot list your app on the Play Store for users to download.
When people ask what is a Google Play Console account, they are usually trying to understand how it works and why it is necessary. In simple words, this account is part of the Google Play Developer platform and is used by app developers around the world. Once you create it and pay the one-time registration fee, you get full access to the tools needed to manage your Android apps.
Many people get confused between the terms Google Play Console, Google Play Developer Account, and Google Developer Console Account. These terms are sometimes used in the same way, but there are small differences you should know. The Google Play Console is the actual platform you use to publish and manage Android apps. When you register for this, you are creating what is called a Google Play Developer Account. Both terms refer to the same thing in most cases.
On the other hand, Google Developer Console Account is a more general term. It can refer to other platforms provided by Google, such as APIs, Google Cloud, Firebase, or other developer tools. If you are only working on Android apps and want to get them on the Play Store, what you really need is a Google Play Console account or a Google Play Developer account.
So, if you are starting and feel unsure about what is a Google Play Console account, just remember it is your gateway to the Google Play Store. It gives you everything you need to create, manage, and grow your apps. Understanding this difference helps you choose the right platform for your goal and avoid wasting time setting up the wrong type of account.
How to Create a Google Play Console Account
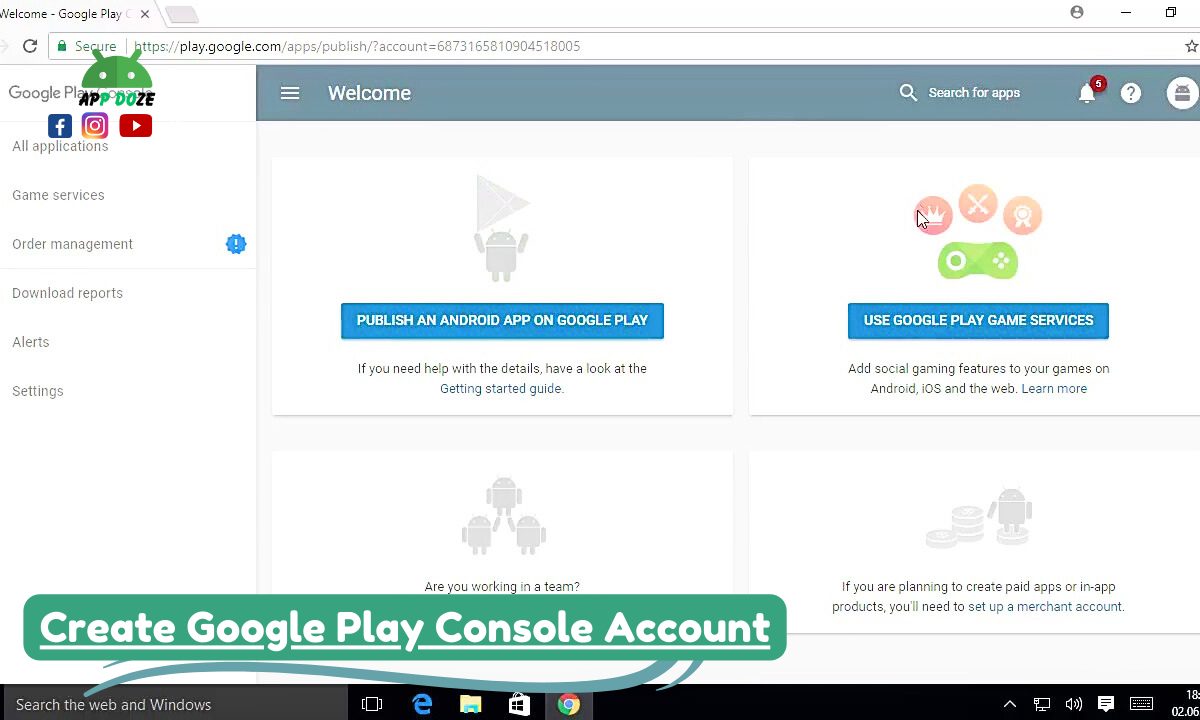
If you’re planning to publish your own Android app on the Play Store, you need to know how to create a Google Play Console account. This process is simple, but you must have a few things ready before you start. You’ll need a Google account, your basic developer details, and a valid payment method.
Many people search for how do I create a Google Play Console account, especially first-time developers. Here’s a step-by-step guide to help you complete the registration easily:
Step 1: Sign in to Google Play Console
Go to the official Google Play Console website. Use your existing Google account to sign in. If you don’t have a Google account, you need to create one first. This Google account will be linked to your developer profile and used for future communication from Google.
Step 2: Accept the Developer Agreement
Once you sign in, you’ll be asked to review and accept the Google Play Developer distribution agreement. This document contains the rules and conditions you must follow as a developer on the Play Store. Read it carefully, then agree to continue.
Step 3: Pay the One-Time Registration Fee
To create your Google Play Console account, Google asks for a one-time registration fee of $25. This fee gives you lifetime access to the console. Enter your payment details, such as a debit or credit card, and complete the transaction.
Step 4: Complete Your Developer Profile
After the payment is successful, you’ll need to fill in your developer profile. This includes basic information like your developer name, email address, phone number, and website (if you have one). This information will be shown to users on your app’s page, so make sure it looks professional.
Once you complete all the steps, your Google Play Console account will be ready. You can now start uploading your apps, setting prices, and managing updates. If you want to make your app available to users around the world, the console will guide you through setting up language options, device compatibility, and more.
If you’re wondering how to create a Google Play Console account without any confusion, just follow these steps one by one. You don’t need advanced knowledge, just a clear idea of what details to provide. You can also take screenshots during the process for your records or to help others later.
How to Create a Google Play Developer Account for Free – Is It Possible?
If you’re looking into how to create a Google Play Console account for free, you might be wondering if there’s any way to skip the registration cost. While it’s a common question, the short answer is no—you cannot create a Google Play Developer account for free.
Google charges a one-time registration fee of $25 when you sign up for a developer account through the Google Play Console. This fee is required for everyone, whether you are an individual, student, or business. Once you pay, you get lifetime access to publish and manage apps on the Play Store without paying anything again.
So when you hear people asking how to create a Google Play Developer account for free, they are usually hoping for a free option. The truth is, Google doesn’t offer a fully free version of the Play Console for app publishing. However, the good thing is that the fee is not high, especially considering it’s a one-time payment.
If you’re a student or running a small startup, there are a few tips that might help you manage the cost:
- Ask your school or university if they offer support for student developers. Some tech programs or app development courses might reimburse or cover the registration fee.
- If you’re building an app as part of a company or team project, ask your team to share the cost or have the company pay it using a business card.
- Look for local or online developer communities. Some events or contests offer free Play Console access as part of developer support or prizes.
Even though it’s not possible to fully avoid the fee, $25 for lifetime access is one of the lowest entry costs in the software world. Once you complete the registration, you can use all the features of the Google Play Console to publish and grow your apps. So, while you cannot create a Google Play Console account for free, it’s still very affordable for most developers.
How to Create a Google Play Console Account for an Organization
If you are creating an app on behalf of a business, company, or team, then it is better to create your Google Play Console account as an organization instead of as an individual. Knowing how to create a Google Play Console account for an organization helps you manage your apps more professionally and allows multiple team members to collaborate using different roles and permissions.
The process is similar to an individual registration but with a few key differences. Here’s what you need to know and do:
Step 1: Sign in to the Google Play Console
Start by visiting the Google Play Console and sign in with your business email. If you don’t have one yet, you can create a new Google account specifically for your organization. It’s a good idea to avoid using a personal Gmail account if you are registering for a business.
Step 2: Select “Organization” During Registration
While filling out your developer profile, you’ll see an option to register as an individual or an organization. Choose “organization” and enter your legal business name as it appears in official documents. This name will show on the Play Store under your app, so make sure it matches your business brand.
Step 3: Provide Required Business Information
You will need to fill in your company’s details, such as:
- Business name
- Business address
- Phone number
- Website (if available)
- Contact email
In some regions or for certain services, Google might ask for a D-U-N-S Number. This is a unique business identification number used internationally. If you don’t already have it, you can request one for free from Dun & Bradstreet. It’s not always required, but it helps verify your business identity if needed.
Step 4: Pay the One-Time Registration Fee
Even for organization accounts, you still need to pay the $25 registration fee. Once you complete the payment, your organization account will be active.
Step 5: Set Up Team Access and Permissions
One of the benefits of creating a Google Play Console account for an organization is the ability to add team members. You can invite other users to the console and assign them different roles—like admin, developer, marketing, or support. Each role has specific permissions, so only the right people can access certain features.
To manage users, go to the “Users and permissions” section in the Play Console. Here, you can control access, remove users, or add new team members anytime.
Final Tips
- Make sure your business information is correct, especially your company name and email address.
- Use a shared organization email for registration instead of a personal one. This is better for managing access in the future.
- Keep your business phone and email active and monitored. Google might contact you for account verification or app-related issues.
How to Create a Service Account in Google Play Console
If you want to automate some tasks or allow apps and tools to access your Google Play data, you need a service account. Knowing how to create a service account in Google Play Console helps when you’re working with APIs or external platforms like CI/CD tools, analytics services, or third-party app managers.
A service account is a special type of Google account that belongs to your application, not to a person. You can use it to perform automated actions securely without sharing your main login credentials.
Here’s how you can set it up step by step:
Step 1: Go to Google Cloud Console
First, visit the Google Cloud Console. Make sure you are signed in with the same Google account used for your Google Play Console. If this is your first time, you might need to create a new project. Name the project something like “Play Console Integration” to keep it organized.
Step 2: Enable the Google Play Developer API
In your Cloud Console, go to “APIs & Services” and click on “Library.” Search for Google Play Developer API and enable it. This API allows your service account to access and manage app data in the Play Console.
Step 3: Create the Service Account
After enabling the API, follow these steps:
- Go to “IAM & Admin” > “Service Accounts”
- Click on “Create Service Account”
- Give the service account a name, such as “play-console-access”
- Click “Create and Continue”
- On the permissions screen, you can skip adding roles now
- Finish the process and go to the list of service accounts
Step 4: Generate a JSON Key
Click on your new service account and go to the “Keys” tab. Click “Add Key” and select “Create new key.” Choose the JSON format. A file will download to your computer. Keep this file safe because it contains the credentials your app or tool will use to access the Play Console.
Step 5: Link the Service Account to Google Play Console
Now go back to the Google Play Console.
- Go to Settings
- Click on API access
- Click “Link service account”
- Choose the account you just created from the list (it will show up if the same Google account is used)
- Grant the necessary permissions, such as View app information, Manage releases, etc.
- Save the changes
You can now use this service account with tools that support Google Play Developer API. This includes tasks like uploading new app versions, checking release status, or reading reports—all without logging in manually.
Final Tips
- Do not share your JSON key file with others. It’s sensitive data that grants access to your account.
- Always remove unused service accounts from both the Cloud Console and Play Console.
- Monitor the API activity regularly to make sure everything works as expected.
How to Create a Merchant Account in Google Play Console
If you want to earn money through your Android apps—either by selling the app itself or offering in-app purchases—you must set up a merchant account. Learning how to create a merchant account in Google Play Console is important if you plan to accept payments from users.
A merchant account connects your developer profile with the Google Payments system. This allows you to receive payouts from sales made on the Google Play Store.
Why You Need a Merchant Account
When you publish a paid app or add in-app purchase options, Google needs a way to process payments and send the money to your bank account. A merchant account handles all the financial operations, such as:
- Receiving money from app sales
- Managing in-app purchases and subscriptions
- Tracking transactions and payouts
- Accessing financial reports
Without a merchant account, you can still publish free apps, but you cannot earn revenue from them.
Steps to Create a Merchant Account in Google Play Console
You can create a merchant account directly from your Google Play Console. Follow these steps:
Step 1: Sign in to Google Play Console
Go to Google Play Console and sign in using your developer account.
Step 2: Navigate to Setup
On the left-side menu, find and click on Monetize or Set up payments profile. If you do not see this option directly, go to Settings and then look for the Payments section.
Step 3: Start Merchant Account Setup
Click on the button that says Set up a merchant account or Create payments profile. This will redirect you to the Google Payments Merchant Center.
Step 4: Complete the Payment Profile
You will now be asked to enter the following information:
- Business name
- Contact details
- Country
- Tax information (if required)
- Bank account details for receiving payments
Make sure you enter accurate and complete information. This account will be used for financial transactions, so any wrong details may cause payment delays.
Step 5: Save and Link
After you submit the form, your merchant account will be automatically linked to your Play Console account. You can now return to Play Console and see the Payments profile connected to your developer profile.
Step 6: Start Monetizing
Once your merchant account is active, you can:
- Set pricing for your apps
- Add in-app products and subscriptions
- Access sales reports and payment history
You can manage and update your merchant account anytime by visiting the Google Payments Center.
If you’re working as an organization, make sure your payment profile reflects the business details, not personal information. Always keep your bank info and tax data up to date to avoid payout issues.
How to Create a Google Developer Console Account
You might be wondering how to create a Google Developer Console account, especially if you are new to Android development or planning to use various Google services for your app. It’s important to understand that the term “Google Developer Console” can refer to different platforms under the Google Developer umbrella, depending on what you want to do.
Difference Between Google Developer Console and Google Play Console
Google Play Console is a specific platform within the wider Google Developer ecosystem. It is mainly used to publish and manage Android apps on the Google Play Store. When people talk about creating a developer account for app publishing, they usually mean the Google Play Console.
On the other hand, the Google Developer Console is a more general term. It usually refers to the Google Cloud Console or Google APIs Console—a platform where you can enable APIs, manage billing accounts, use Firebase, create service accounts, and access tools like Google Maps API, YouTube API, and more.
Creating a Google Developer Console Account
To access APIs, Firebase, and other tools provided by Google, follow these steps:
- Go to the Google Cloud Console.
- Sign in using your existing Google account. If you do not have one, create a new Google account first.
- After signing in, you will be asked to set up a project. Click Create Project.
- Give your project a name and choose your organization (if applicable).
- After the project is created, you can enable APIs, create service accounts, and set up Firebase services.
- You may also be prompted to set up billing information if your selected API requires it.
This is different from Google Play Console. Even though both use your Google account, they serve different purposes. Google Play Console is for app publishing and managing apps on the Play Store, while Google Cloud Console or Developer Console is for backend services, APIs, and automation.
Why You Might Need Both
If you are building a complex app, you might use both platforms. For example:
- You use Google Play Console to publish your Android app.
- You use Google Cloud Console to access APIs like Google Maps, Firebase Authentication, or Analytics.
Creating a Google Developer Console account gives you access to a wide range of services. If your focus is only on publishing apps, then Google Play Console is what you need. But if your app requires more backend support, APIs, or Firebase, you will likely use both platforms together.
FAQs
Can I create a Google Play Developer Account for free?
Unfortunately, creating a Google Play Developer Account is not completely free. There is a one-time registration fee of $25, which allows you to publish and manage Android apps on the Google Play Store. This fee is necessary for activating your developer account, but after paying it, you get lifetime access to the Play Console. There are no recurring costs unless you decide to use paid services or in-app purchases.
What is the difference between a Developer and a Service Account?
A Developer Account is typically used for managing and publishing apps on the Google Play Store. This account type is associated with a Google Play Console, where you upload your apps, track their performance, and manage updates.
A Service Account, on the other hand, is a special type of account used for automated processes or backend services. It allows non-human systems to interact with Google APIs and other Google services, such as Firebase, Google Cloud, or Google Analytics. Service Accounts are usually tied to specific tasks like API access, which doesn’t require human intervention, but they do play a critical role in app development.
Do I need a merchant account for free apps?
No, you do not need a merchant account if you are only offering free apps on the Google Play Store. A merchant account is required only if you are planning to sell apps or offer in-app purchases that involve financial transactions. If your app is free and doesn’t include paid features, you can manage it without a merchant account. However, if you plan to monetize your app in the future, you will need to set up a merchant account to handle payments.
Can I transfer ownership of an account?
Yes, it is possible to transfer ownership of a Google Play Developer account. However, this process is a bit involved. The current owner must initiate the transfer by contacting Google Play support and submitting a request to change account ownership. The new owner must also meet certain requirements, such as having an active Google account and a valid developer profile. Note that the process may take some time, and it’s important to follow the proper steps to avoid losing control of your account.
How long does it take to get approved?
Once you have paid the registration fee and submitted your Google Play Developer account application, it usually takes a few hours to a couple of days to get approved. The approval process can vary based on factors like your Google account history and any additional verification that might be needed. If you run into any issues or delays, you can reach out to Google support for assistance. Once approved, you will be able to start publishing apps and managing your developer profile.
Conclusion
To recap, creating a Google Play Console account is essential for anyone looking to release an Android app to the public. Whether you are an independent developer or part of a larger organization, this account serves as your gateway to managing your app, tracking its performance, and ensuring it reaches users on the Play Store.
If you are setting up an account, make sure you choose the right type based on your needs. For individual developers, signing up for a standard Google Play Developer Account is sufficient. If you are running a business or plan to have a team, an organization account might be the better choice. If you’re looking to monetize your app, you’ll also need to set up a Merchant Account to handle payments and in-app purchases.
By following the steps outlined in this guide, you’ll be able to set up the correct Google Play Console account, ensuring that your Android app development process goes smoothly. Whether you’re aiming to build your app as a hobby or as a business venture, getting the account setup right from the start is crucial. Now that you understand how to create a Google Play Console account and the different options available, you’re ready to move forward with your app development journey.

Charles Mata is an experienced app developer and educator, passionate about helping others build powerful mobile applications. He publishes in-depth guides on app development, covering Android Studio, Firebase, Google Play Console, and more. With a practical approach, he simplifies complex coding concepts, making them easy for beginners and advanced developers alike.
Charles also offers a premium website development course, where he teaches step-by-step strategies to build, optimize, and scale websites for success. Whether you’re a beginner looking to learn app development or an entrepreneur wanting to create a website, his expert insights will guide you every step of the way.