If you are planning to start Android development on Ubuntu, the first thing you need is Android Studio. It is a free and powerful software made by Google that lets you build Android apps easily. You can write code, test apps, and use tools like emulators and layout editors, all in one place.
In this guide, you will learn how to install Android Studio on Ubuntu step by step. Whether you are using Ubuntu 24.04, 22.04, or even 18.04, you will find the right method for your system. Some people like using the terminal, some prefer downloading the tar.gz file, and others might want to install only the Android SDK or Flutter without Android Studio. So don’t worry—we’ll cover all those ways to help you set up everything smoothly.
Prerequisites Before Installation
Before you install Android Studio on your Ubuntu system, there are a few things you should prepare. These are important steps to avoid errors during installation and make sure everything works properly.
System Requirements
First, check if your system meets the basic requirements. Android Studio needs a 64-bit operating system and a decent amount of RAM and disk space. Here’s what you should have:
- A 64-bit version of Ubuntu (18.04, 22.04, or 24.04)
- At least 8 GB RAM (4 GB minimum, but not recommended)
- 2 GB of available disk space (more if you plan to install emulators)
- A screen resolution of 1280×800 or higher
If your computer is older or slower, Android Studio might run slowly. It’s better to close other apps while using it to improve performance.
Install Java JDK (OpenJDK 11 or 17)
Android Studio requires Java to run. The best choice for Ubuntu is OpenJDK. You can install it with a simple terminal command.
To install OpenJDK 11, use:
sqlCopyEditsudo apt update
sudo apt install openjdk-11-jdk
If you want to use a newer version like OpenJDK 17:
nginxCopyEditsudo apt install openjdk-17-jdk
Once installed, check if Java is working by typing:
nginxCopyEditjava -version
This command should show the version of Java installed on your system.
Enable Snap Package Support (If Needed)
One of the easiest ways to install Android Studio on Ubuntu is through the Snap package system. Many new versions of Ubuntu come with Snap pre-installed. But if you are using an older version or Snap is not available, you can enable it manually.
Use this command to install Snap:
sqlCopyEditsudo apt update
sudo apt install snapd
After this, restart your system or log out and log back in to apply the changes.
Once these prerequisites are ready, you can move on to installing Android Studio in different ways. Whether you use the terminal, download the tar.gz file, or install Flutter separately, having the system set up correctly will save you a lot of trouble later.
How to Install Android Studio on Ubuntu 22.04 Using Terminal
If you are using Ubuntu 22.04 and want the easiest way to install Android Studio, then using the terminal is your best option. This method is quick, clean, and doesn’t require you to manually download or extract any files. You will use the Snap package manager, which is already supported in Ubuntu 22.04 by default.
Here’s how to install Android Studio on Ubuntu 22.04 using the terminal:
Step 1: Update Your System
Before installing anything, it’s always a good idea to update your system. Open your terminal and run:
sqlCopyEditsudo apt update
This makes sure your system has the latest software and package info.
Step 2: Install Android Studio Using Snap
Now you can install Android Studio with just one command:
cssCopyEditsudo snap install android-studio --classic
The --classic option is important. It allows Android Studio to access the system files and resources it needs to run properly.
Snap will automatically download the latest stable version of Android Studio and install it on your system. Depending on your internet speed, this may take a few minutes.
Step 3: Launch Android Studio
After installation is complete, you can launch Android Studio in two ways:
- Type this command in the terminal:
CopyEditandroid-studio
- Or, go to your applications menu, search for “Android Studio”, and click to open.
Step 4: Complete the First-Time Setup
When you open Android Studio for the first time, it will guide you through a setup wizard. You can choose the standard installation and let it download the required SDK components.
Make sure to also check the box that installs the Android Virtual Device (AVD) if you plan to test your apps on an emulator.
Now your development environment is ready, and you can start creating Android apps.
This method is perfect if you are wondering how to install Android Studio on Ubuntu 22.04 or how to install Android Studio on Ubuntu using the terminal. It’s beginner-friendly and doesn’t require any manual configuration.
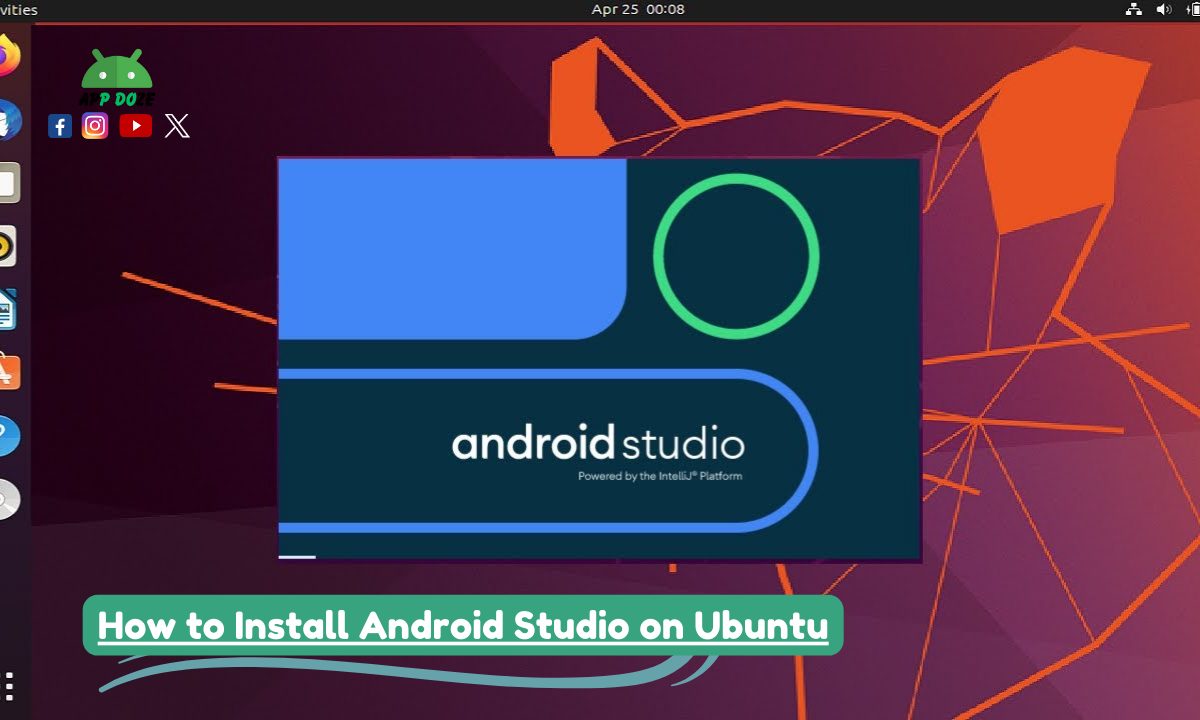
How to Install Android Studio on Ubuntu 24.04
If you are using the latest version of Ubuntu, which is Ubuntu 24.04, then the process of installing Android Studio is very smooth. This version of Ubuntu works well with the newest versions of Android Studio, Java JDK, and other development tools. But still, you should follow the right method to avoid any issues.
Compatibility with Java and System Packages
Ubuntu 24.04 supports newer versions of Java, like OpenJDK 17 and OpenJDK 21. Android Studio also works perfectly with these versions. But for safe performance, it’s better to use OpenJDK 11 or 17 since they are tested and stable with Android development tools.
You can install Java using this command:
nginxCopyEditsudo apt install openjdk-17-jdk
Then, confirm your Java version by typing:
nginxCopyEditjava -version
If Java is set up correctly, you can move to the installation of Android Studio.
Method 1: Install Android Studio Using Snap
Snap is already built into Ubuntu 24.04, so this is the easiest method.
Run this command in your terminal:
cssCopyEditsudo snap install android-studio --classic
This will install the latest stable version of Android Studio with all its required files. The --classic option allows the app to access system-level resources.
How to Open Android Studio After Installation
Once the installation is finished, you can launch Android Studio in two ways:
- Type
android-studioin your terminal - Or search “Android Studio” in your apps menu and click on it
The first time you open it, a setup wizard will appear. Follow the steps to download the Android SDK, emulator, and other tools. You can choose the standard option if you’re new.
Method 2: Use .deb Package (If Snap Does Not Work)
In some rare cases, Snap might give errors or not work properly. You can try the .deb package method instead.
- Go to the official Android Studio website:
https://developer.android.com/studio - Download the
.debfile - Open your terminal and go to the folder where the file is downloaded. Then run:
nginxCopyEditsudo apt install ./android-studio-*.deb
This will install Android Studio using the Debian package format.
Whether you use Snap or .deb, both methods are good if you are looking for how to install Android Studio on Ubuntu 24.04. Just choose the one that works better for your system. Once installed, you can start coding your Android apps right away.
How to Install Android Studio on Ubuntu 18.04
If you are using Ubuntu 18.04, you can still install Android Studio, but there may be a few extra steps compared to newer versions. Since 18.04 is an older system, some packages may be outdated or missing. But don’t worry — with the right method, you can get Android Studio running smoothly.
Step 1: Update Your System
First, open your terminal and run the update command. This helps you avoid many common errors during installation.
sqlCopyEditsudo apt update
sudo apt upgrade
It’s also a good idea to restart your system after updating.
Step 2: Install Java JDK
Android Studio needs Java to work. For Ubuntu 18.04, OpenJDK 11 is the safest and most stable choice.
Install it by running:
nginxCopyEditsudo apt install openjdk-11-jdk
After the installation, check if Java is active:
nginxCopyEditjava -version
If the command shows version 11, you’re good to go.
Step 3: Enable Snap (If It’s Not Already Installed)
Snap is not always enabled by default in Ubuntu 18.04. To install it, use:
nginxCopyEditsudo apt install snapd
After installing snapd, you should reboot or log out and back in to activate the Snap service.
Step 4: Install Android Studio Using Snap
Now you can install Android Studio with this simple command:
cssCopyEditsudo snap install android-studio --classic
This downloads and installs the full version of Android Studio.
Step 5: Launch Android Studio
Once installed, you can open it from the terminal:
CopyEditandroid-studio
Or find it in your application launcher.
Follow the setup wizard. It will ask you to install the Android SDK, emulator, and other tools. Choose the standard option if you are not sure.
Tips for Fixing Missing Dependencies
On Ubuntu 18.04, you might face errors related to missing packages or libraries. Here are a few things you can try:
- If the Android Emulator doesn’t run, install these libraries:
nginxCopyEditsudo apt install lib64stdc++6 libgl1-mesa-dev
- If the studio.sh script crashes (when using tar.gz), make sure 32-bit libraries are available:
rubyCopyEditsudo apt install libc6:i386 libncurses5:i386 libstdc++6:i386
- Also, check if your system supports virtualization (needed for emulators). You can check this with:
bashCopyEditegrep -c '(vmx|svm)' /proc/cpuinfo
If the result is 0, virtualization is not supported.
That’s how to install Android Studio on Ubuntu 18.04. While this version may need some extra setup, it still works fine if you follow these steps carefully. Just take your time and test things one by one.
How to Install Android Studio on Ubuntu from tar.gz
If you prefer to install Android Studio manually or if the Snap method doesn’t work on your system, you can use the tar.gz file. This method gives you more control and is also helpful if you want to install Android Studio without using Snap. It works well on most Ubuntu versions, including Ubuntu 18.04, 22.04, and 24.04.
Follow these steps to learn how to install Android Studio on Ubuntu from tar gz.
Step 1: Download Android Studio tar.gz File
Go to the official Android Studio website:
https://developer.android.com/studio
Click the Download Android Studio button and choose the Linux version. You will get a file named something like android-studio-ide-xxxx.xxxxxx-linux.tar.gz.
Save this file in your Downloads folder or anywhere you prefer.
Step 2: Extract the tar.gz File
Open your terminal and move to the folder where you downloaded the file. For example:
bashCopyEditcd ~/Downloads
Now extract the file using:
nginxCopyEdittar -xvzf android-studio-*-linux.tar.gz
This will create a new folder named android-studio.
Step 3: Run Android Studio Manually
Now go into the android-studio/bin directory:
bashCopyEditcd android-studio/bin
Run the Android Studio by executing:
bashCopyEdit./studio.sh
This will start Android Studio. You can now follow the setup wizard and install SDKs, emulators, and other tools.
Step 4: (Optional) Add Android Studio to System PATH
If you don’t want to open the terminal and run studio.sh it every time, you can add Android Studio to your PATH.
Here’s how:
- Open your
.bashrcor.zshrcfile in your home directory using a text editor:
bashCopyEditnano ~/.bashrc
- Add this line at the end:
rubyCopyEditexport PATH=$PATH:/home/your-username/Downloads/android-studio/bin
Replace your-username with your actual Ubuntu username and adjust the path if you moved the folder somewhere else.
- Save and close the file. Then reload it using:
bashCopyEditsource ~/.bashrc
Now you can simply type studio.sh from any terminal window to launch Android Studio.
Using this method, you don’t depend on Snap or APT. This is perfect if you want full control over the setup or if you’re trying to fix errors by starting fresh. Whether you’re installing Android Studio on Ubuntu 22.04, 24.04, or 18.04, this tar.gz method will work the same way.
How to Install Android SDK on Ubuntu (With or Without Android Studio)
If you want to install the Android SDK on Ubuntu, you have two options. You can install it automatically with Android Studio, or you can install it manually if you want to use it without Android Studio. Many developers who prefer working with command-line tools or using other code editors like VS Code choose the second option.
This method works on all Ubuntu versions, including Ubuntu 22.04. Here’s how to install the Android SDK on Ubuntu with or without Android Studio.
Option 1: Install Android SDK with Android Studio
If you already have Android Studio installed, then the SDK is usually installed automatically during the setup. The installer will guide you to choose a location for the SDK. Most of the time, it is saved in this path:
swiftCopyEdit/home/your-username/Android/Sdk
You can check the exact path by going to:
Android Studio > Preferences > Appearance & Behavior > System Settings > Android SDK
From there, you can also install extra SDK tools and system images.
Option 2: Install Android SDK Without Android Studio
If you don’t want to use Android Studio, you can still install the Android SDK using command-line tools. This is useful if you prefer lightweight setups or use other development environments.
Step 1: Download SDK Command-Line Tools
- Go to the official Android developer tools page:
https://developer.android.com/studio#command-tools - Scroll down to the Command line tools only section
- Download the Linux version
You’ll get a file like commandlinetools-linux-xxxx_latest.zip.
Step 2: Extract the Tools
Open your terminal and go to the folder where you downloaded the file:
bashCopyEditcd ~/Downloads
Then extract it:
bashCopyEditmkdir -p ~/Android/cmdline-tools
unzip commandlinetools-linux-*.zip -d ~/Android/cmdline-tools
Rename the folder:
bashCopyEditmv ~/Android/cmdline-tools/cmdline-tools ~/Android/cmdline-tools/latest
Step 3: Set Environment Variables
Now you need to set up environment variables so your system can find the SDK.
Open your .bashrc file:
bashCopyEditnano ~/.bashrc
Add these lines at the bottom:
bashCopyEditexport ANDROID_HOME=$HOME/Android
export PATH=$PATH:$ANDROID_HOME/cmdline-tools/latest/bin
export PATH=$PATH:$ANDROID_HOME/platform-tools
Save and close the file, then run:
bashCopyEditsource ~/.bashrc
Step 4: Install SDK Packages
Now you can use the sdkmanager tool to install the SDK components.
First, accept licenses:
cssCopyEditsdkmanager --licenses
Then install the SDK:
nginxCopyEditsdkmanager "platform-tools" "platforms;android-34" "build-tools;34.0.0"
You can also list available packages by running:
cssCopyEditsdkmanager --list
This method gives you a clean and fast way to use the Android SDK without the full Android Studio environment. It works well for CI pipelines, low-spec systems, or developers using lightweight editors.
So whether you’re asking how to install Android SDK on Ubuntu or how to install Android SDK on Ubuntu 22.04 specifically, these steps will help you get it done with or without Android Studio.
How to Install Flutter Without Android Studio on Ubuntu
You don’t always need Android Studio to build apps with Flutter. If you prefer a simple and fast setup, you can install Flutter without Android Studio on Ubuntu. This method is good if you want to use a lighter code editor like VS Code or just work in the terminal. It also saves system resources and gives you more control.
Here is how to install Flutter without Android Studio on Ubuntu.
Step 1: Install Flutter SDK
First, download the latest Flutter SDK for Linux:
- Go to the official Flutter website:
https://flutter.dev/docs/get-started/install/linux - Download the
.tar.xzfile for Linux
Once downloaded, open your terminal and go to the folder where the file is saved. For example:
bashCopyEditcd ~/Downloads
Then extract the file:
nginxCopyEdittar xf flutter_linux_*.tar.xz
Move the extracted flutter folder to a permanent location, like your home directory:
bashCopyEditmv flutter ~/flutter
Step 2: Add Flutter to System PATH
You need to add the Flutter binary to your PATH so you can use it from any terminal.
Open your .bashrc file:
bashCopyEditnano ~/.bashrc
Add this line at the bottom:
bashCopyEditexport PATH="$PATH:$HOME/flutter/bin"
Save and close the file, then reload it:
bashCopyEditsource ~/.bashrc
Now you can check if Flutter is available by typing:
cssCopyEditflutter --version
It should show the installed version of Flutter.
Step 3: Run flutter doctor
To check if everything is working properly, run:
nginxCopyEditflutter doctor
This tool checks your system and shows what’s missing. If you haven’t installed the Android SDK yet, it will show a warning. You can install the Android SDK separately using command-line tools, as explained in the previous section.
If you plan to build only web or desktop apps, you might not need the Android SDK at all.
Step 4: Use Flutter with VS Code or Terminal
Flutter works well with VS Code. You don’t need Android Studio to write or run Flutter apps.
To use Flutter with VS Code:
- Open VS Code
- Go to Extensions
- Search for “Flutter” and install the plugin
- It will also ask to install the Dart plugin — install that too
Now, you can create and run Flutter projects directly from VS Code.
If you prefer using the terminal, you can create a Flutter project with:
arduinoCopyEditflutter create my_app
cd my_app
flutter run
Make sure your emulator or device is ready before running the app.
This method is perfect if you’re searching for how to install Flutter without Android Studio on Ubuntu. It keeps your setup light, clean, and fast — ideal for development on low-end machines or when you just want more control.
FAQs
If you are new to installing Android tools on Ubuntu, you might have a few common questions. Here are some answers that can help you understand things better and avoid confusion during setup.
Can I install Android Studio on all Ubuntu versions?
Yes, you can install Android Studio on all modern versions of Ubuntu, including 18.04, 22.04, and 24.04. The main difference is that newer versions have better support for updated packages, so the installation goes more smoothly. On older systems like 18.04, you may need to fix a few missing dependencies or install Java manually before starting.
What is the difference between installing using terminal and tar.gz?
When you install Android Studio using the terminal (through Snap), the process is quick, automatic, and managed by Ubuntu’s package system. You don’t have to worry about paths or updates — everything is handled for you.
But if you install it using the tar.gz file, you download and extract it manually. This method gives you more control, but you need to set up things like the path and updates on your own. It’s good for custom setups or systems where Snap doesn’t work.
Is it possible to install Flutter without Android Studio?
Yes, you can install Flutter without Android Studio on Ubuntu. You just need to download the Flutter SDK and add it to your system path. Then, you can use Flutter through the terminal or with a lighter editor like VS Code. This setup works well if you don’t want to install heavy software or if you’re building for web or desktop.
How do I update Android Studio and SDK later?
If you installed Android Studio using Snap, it will update automatically in the background. You don’t need to do anything. But if you installed it using the tar.gz file, you will need to download the latest version from the website and replace the old folder.
For SDK updates, you can open Android Studio and use the SDK Manager to download the latest tools and packages. If you’re using the command-line tools, you can run:
cssCopyEditsdkmanager --update
This will update all the SDK packages you installed earlier.
Will these methods work on Ubuntu derivatives like Pop!_OS or Linux Mint?
Yes, these methods also work on most Ubuntu-based systems like Pop!_OS, Linux Mint, and Zorin OS. The steps are almost the same because they all use the same core as Ubuntu. Just make sure your system supports Snap if you are using that method, or go with the tar.gz method if Snap is not available.
These questions come up often when setting up Android development on Linux. If you follow the steps as shown, you can set up your system easily and start building apps without any major problems.
Final Thoughts
Now you know different ways to install Android Studio and related tools on Ubuntu. Whether you are using Ubuntu 18.04, 22.04, or 24.04, the methods shared in this guide will help you get started with Android development smoothly.
You can install Android Studio using the terminal with the Snap command, which is the easiest and fastest method. If you prefer manual control or Snap is not working, you can go with the tar.gz file method. It gives you more freedom, but it needs extra setup like adding the path manually.
You also learned how to install the Android SDK without Android Studio using command-line tools. This is helpful if you want a lightweight setup or are building custom development environments. And if you are working with Flutter, you now know how to install Flutter without Android Studio, so you can use VS Code or the terminal for building apps.
No matter which method you choose, keeping your SDK and tools updated is very important. Updated tools improve performance, fix bugs, and support the latest features. You can use the sdkmanager tool or Android Studio’s built-in update options to stay current.
If this guide helped you, make sure to bookmark it so you can come back later. And feel free to share it with other developers who might need help setting up Android Studio or Flutter on Ubuntu. It could save them time and frustration.

Charles Mata is an experienced app developer and educator, passionate about helping others build powerful mobile applications. He publishes in-depth guides on app development, covering Android Studio, Firebase, Google Play Console, and more. With a practical approach, he simplifies complex coding concepts, making them easy for beginners and advanced developers alike.
Charles also offers a premium website development course, where he teaches step-by-step strategies to build, optimize, and scale websites for success. Whether you’re a beginner looking to learn app development or an entrepreneur wanting to create a website, his expert insights will guide you every step of the way.