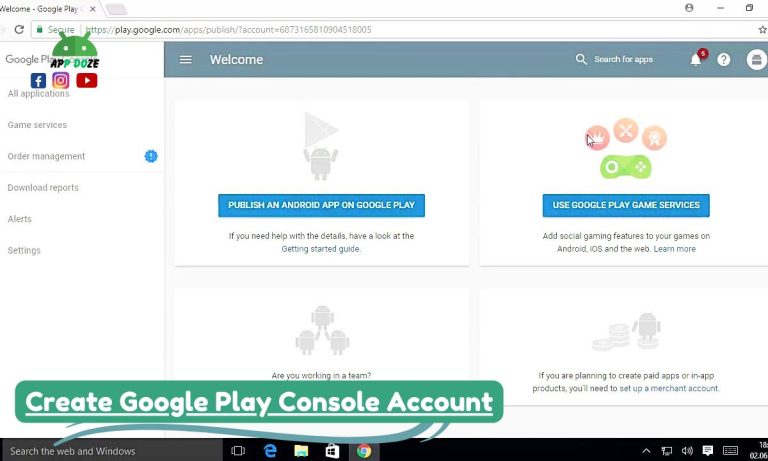
The Google Play Console is an essential tool for managing Android apps on the Google Play Store. It allows developers and app owners to manage their app’s performance, track downloads, and handle updates. It’s your one-stop platform for overseeing every part of your app’s journey, from launch to ongoing maintenance.
As your app grows, you’ll likely need to collaborate with other team members. This is where user access and collaboration come into play. By sending invitations to other users, you can grant them different levels of access to help with the management and development of the app. Whether it’s a developer working on code or an analyst reviewing app performance, managing permissions is key to smooth operations.
This guide will walk you through the process of sending invites in the Google Play Console so you can efficiently collaborate with others.
What is Google Play Console?
What is Google Play Console? It is a platform designed to help developers manage their Android apps. It’s the backend dashboard that gives you all the tools you need to maintain your app on the Google Play Store. From publishing updates to analyzing user feedback, the Google Play Console provides access to everything you need to keep your app running smoothly.
Some of the key features of the console include:
- App Distribution: You can upload, manage, and distribute your app to users on the Google Play Store. It helps ensure that your app reaches the right audience.
- Performance Tracking: The console tracks key metrics such as downloads, active users, and user reviews. This helps you understand how your app is performing and what areas need improvement.
- User Management: You can invite team members to help with app management. This is where sending invites becomes important. It allows you to grant specific roles and permissions so everyone can focus on their area of expertise without interfering with other parts of the app’s management.
Sending invites is a crucial part of managing your app effectively. It ensures that the right people have access to the right tools and resources within the Google Play Console.
Why You Need to Send Invites in Google Play Console
Collaborating with others is a must for managing your app effectively. Whether you’re working with developers, designers, marketers, or analysts, each person brings their expertise. Sending invites allows you to work together more efficiently, with each team member handling specific tasks that match their skills.
Here’s why sending invites is so important:
- Streamline App Management: By inviting the right people, you can delegate tasks easily. Developers can focus on the code, analysts can track performance, and marketers can manage the app’s visibility. This division of labor helps ensure that everything runs smoothly.
- Role-Based Access: When you send invites, you can assign different roles to each user. For example, you can give a developer full access to manage the app, while an analyst may only need access to performance data. Roles like Admin, Developer, and Analyst come with specific permissions that help protect your app’s data and functions.
- Better Control Over Permissions: With the right roles in place, you can control who does what within the Google Play Console. This is especially important for security. By giving each team member only the permissions they need, you can minimize the risk of accidental mistakes or unauthorized changes.
In short, sending invites is a key step in building a strong team around your app while ensuring its safety and smooth operation.
Prerequisites for Sending Invites
Before you can send invitations to others, there are a few prerequisites. First, you need to have the appropriate rights within the Google Play Console. This typically means being an admin or having similar privileges. If you’re not an admin, you may not have access to the “Users and permissions” section, which is where you can invite others.
Here’s what you need to check:
- Admin Rights: To send invites, you must have admin rights or be granted permission to manage users. Admins have full access to the console and can assign roles to other users.
- Proper Permissions: Make sure your account has the necessary permissions to send invites. If you’re unsure, check with the account holder or another admin on your team.
Once you’ve confirmed you have the correct permissions, you can start inviting others to help with your app’s management.
Step-by-Step Guide: How to Send Invites in Google Play Console
Sending invites to team members in the Google Play Console is a simple process. Follow these steps to grant access to others:
Step 1:
Sign in to Google Play Console. First, you need to sign in to your Google Play Console account. Visit the Google Play Console website and enter your credentials to access your dashboard.
Step 2:
Navigate to the “Users and Permissions” section. Once you’re logged in, look for the “Users and permissions” section in the menu. This is where you can manage who has access to your Google Play Console and control their roles.
Step 3:
Click on “Invite New User.” In the “Users and permissions” section, click the option to “Invite new user.” This will open a form where you can enter the details of the person you want to invite.
Step 4:
Enter the user’s email address and select the appropriate role/permissions. Enter the email address of the person you want to invite. After that, you’ll need to select their role within the console. Google Play Console offers different roles, such as Admin, Developer, and Analyst, each with different permissions. Choose the role that best fits the person’s responsibilities.
Step 5:
Send the invitation. Once you’ve filled in the details and selected the role, click the “Send Invitation” button. The invited user will receive an email with instructions on how to accept the invite and access the console. They’ll need to follow the link in the email and sign in to their Google account to complete the process.
This process is simple and ensures that only the right people have access to your Google Play Console account.
Understanding User Roles and Permissions
Google Play Console offers different roles, each with its own set of permissions. Understanding these roles is essential to managing your app and team effectively.
- Admin: The admin has full control over all aspects of the Google Play Console. They can access and modify everything, including app settings, performance reports, and user permissions. This role is suitable for those who need complete access to the console’s features.
- Developer: A developer role allows access to app management and settings. They can manage app updates, fix bugs, and oversee the technical aspects of the app but cannot make changes to the account’s user permissions or billing information.
- Analyst: An analyst has access to data and performance metrics but cannot modify app settings. This role is ideal for team members who need to review app performance, user engagement, and other analytics but do not need access to app development or settings.
- Other Roles: Depending on your needs, there may be other roles available, such as Marketing or Support, that allow specific tasks within the Google Play Console. These roles may come with unique permissions tailored to different tasks, but the core roles are Admin, Developer, and Analyst.
It’s important to assign the correct role to each user to ensure they have the right level of access without risking sensitive information or mismanagement.
Managing and Modifying User Access
As your team grows, you may need to manage or modify user access in Google Play Console. This can be done easily from the “Users and permissions” section. Here’s how to manage and modify access:
How to View and Manage Users
To see who has been invited to your console and what permissions they have, go to the “Users and permissions” section. You’ll find a list of all users, along with their roles and the permissions they’ve been granted. From here, you can monitor who has access to your account and what they can do.
Modifying Permissions or Removing Users
If you need to change someone’s role or permissions, you can do so at any time. Simply select the user whose permissions you want to update and click “Edit” next to their name. You can change their role, add or remove permissions, or even remove them from the console entirely if needed. If you no longer want a user to have access to the console, you can delete their account with a simple click.
Best Practices for Managing Access
It’s crucial to follow best practices when managing user access to protect your app’s data and ensure security:
- Only give access to those who need it.
- Regularly review and update user roles to make sure everyone has the right permissions.
- Remove users who no longer need access or are no longer part of the project.
- Use strong passwords and enable two-factor authentication for added security.
Common Issues with Invitations
One common issue is the invited user not receiving the invitation email. If this happens, ask the user to check their spam or junk folder. Sometimes, email filters might direct the invite there. You should also confirm that you entered the correct email address when sending the invite. A small typo in the email address can prevent the invite from reaching the right person.
Another issue is the wrong permissions being granted. This can happen if you accidentally select the wrong role when sending the invite. It’s important to double-check the role you’ve assigned before sending the invite. If a user receives incorrect permissions, you can modify their role later by going to the “Users and permissions” section and editing their access.
How to Resolve Issues if the Invite Isn’t Being Accepted or the User Can’t Access the Console
If the invited user is having trouble accepting the invitation, make sure they’re signing in with the correct Google account. Sometimes, users may have multiple Google accounts, and they may try to accept the invite using the wrong one. Ask the user to check that they’re using the email address that the invite was sent to.
If the invite has expired, which can happen if it’s been sitting in their inbox for too long, you may need to resend the invitation. Invitations generally expire after a set period, so it’s best to act quickly after sending the invite.
Tips for Avoiding Mistakes When Sending Invites
To avoid mistakes, always double-check the email address of the person you’re inviting. Ensure you’ve selected the correct role and permissions. Double-checking these details helps prevent issues down the line. It’s also a good idea to confirm with the invited person before you send the invite, ensuring you have their correct email and they’re aware they’ll be receiving an invitation.
Additionally, try to keep a list of who you’ve invited and what permissions they have. This will make it easier to manage users and avoid giving out more access than necessary.
Last Words
Sending invites in the Google Play Console is a vital part of managing your app and collaborating with your team. By inviting the right people and assigning them the appropriate roles, you ensure that everyone can contribute to the app’s success while keeping sensitive information secure.
It’s important to follow the steps carefully when inviting users and managing their roles. This way, you can avoid common issues and help your team work together effectively within the Google Play Console. Remember to regularly review permissions and remove any unnecessary access to maintain security.
By following best practices for user management and security, you’ll create a smooth, productive environment for managing your Android apps. Take your time when sending invites, and always make sure the right people have the right access.
FAQs
1. How long does it take for an invite to be accepted?
The invite is usually accepted immediately after the user clicks the link in the email and signs into their Google account. However, if the invite has been sitting in the inbox for too long, it may expire, and you’ll need to send a new one.
2. Can I change a user’s permissions after sending the invite?
Yes, you can modify a user’s permissions at any time after they’ve accepted the invite. Simply go to the “Users and permissions” section in your Google Play Console, select the user, and change their role.
3. What if the invited user doesn’t receive the email?
If the invited user doesn’t receive the email, ask them to check their spam or junk folder. Also, confirm that you’ve entered the correct email address. If the email still isn’t found, resend the invitation or check the Google Play Console for any errors.
4. Can I invite multiple users at once?
Currently, the Google Play Console only allows you to send invitations one user at a time. If you need to invite several users, you will need to repeat the invitation process for each person.
5. What happens if a user accepts the invite but cannot access the console?
If the user can’t access the console after accepting the invite, check if they are signed into the correct Google account. Ensure they are using the email address you sent the invite to. If issues persist, resend the invitation or contact Google Play Console support for assistance.

Charles Mata is an experienced app developer and educator, passionate about helping others build powerful mobile applications. He publishes in-depth guides on app development, covering Android Studio, Firebase, Google Play Console, and more. With a practical approach, he simplifies complex coding concepts, making them easy for beginners and advanced developers alike.
Charles also offers a premium website development course, where he teaches step-by-step strategies to build, optimize, and scale websites for success. Whether you’re a beginner looking to learn app development or an entrepreneur wanting to create a website, his expert insights will guide you every step of the way.