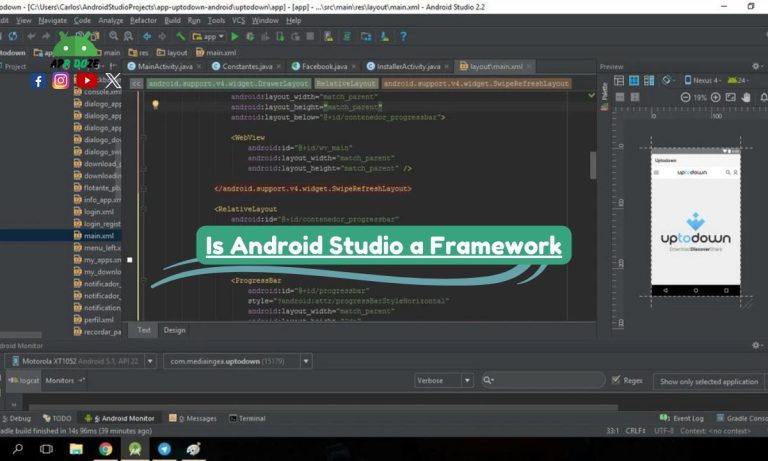
Android Studio is a software that helps you create Android apps. It’s the official tool from Google for Android development. With this tool, you can write code, design app layouts, test your app, and run it on different Android versions using an emulator.

But sometimes, you may want to uninstall Android Studio from your device. Maybe it’s using too much space, or you want to reinstall it because it’s not working properly. You might also switch to another development tool and no longer need it.
Whatever your reason is, this guide will help you uninstall Android Studio step by step. It covers all major operating systems like Windows, Mac, Ubuntu, and Linux. You’ll also learn how to remove all hidden or leftover files completely so your system stays clean.
Uninstall Android Studio on Windows 11
If you are using a Windows 11 laptop or PC and want to remove Android Studio, you can do it easily through the settings. But to uninstall it completely, you also need to remove extra folders that Android Studio creates during installation. Follow the steps below to clean everything.
Step 1: Uninstall from Settings
- Click on the Start menu and go to Settings
- Select Apps and then click on Installed apps
- Scroll down and find Android Studio
- Click the three dots next to it and choose Uninstall
- Follow the prompts and complete the uninstallation
This step removes the main program, but many files are still left behind on your system.
Step 2: Delete Cache and Configuration Folders
You need to delete some folders manually. These folders store your settings, SDK, and emulator files.
Open File Explorer and go to the following locations:
C:\Users\YourUsername\.androidC:\Users\YourUsername\.gradleC:\Users\YourUsername\AppData\Local\Android\SdkC:\Users\YourUsername\AppData\Roaming\GoogleC:\Users\YourUsername\AppData\Local\GoogleC:\Users\YourUsername\AppData\Roaming\AndroidStudio*(may vary based on version)
Delete these folders one by one to remove all leftover data.
Step 3: (Optional) Delete Registry Entries
If you want to clean up the system fully, you can also remove registry entries. Be careful with this step.
- Press Win + R, type regedit, and press Enter
- Navigate to:
HKEY_CURRENT_USER\Software\Google\AndroidStudio*HKEY_LOCAL_MACHINE\SOFTWARE\Android Studio
Delete any Android Studio-related entries.
What to Do If You’re Unable to Uninstall Android Studio
Sometimes you may get errors or the uninstall button doesn’t work. Here’s what you can try:
- Restart your PC and try uninstalling again
- Run as Administrator: Right-click on the uninstaller and choose “Run as administrator”
- Safe Mode: Boot into safe mode and uninstall it from there
- Use a third-party tool like Revo Uninstaller to force remove it
By following these steps, you can uninstall Android Studio from your Windows 11 system completely and free up disk space.
How to Uninstall Android Studio from Mac
If you are using a Mac and want to uninstall Android Studio, you can do it in a few simple steps. But to remove it completely, you also need to delete the hidden folders that store your settings, SDK, and cache files. Here’s how you can do it properly.
Step 1: Move Android Studio to the Trash
- Open Finder
- Go to the Applications folder
- Find Android Studio
- Right-click on it and choose Move to Trash
- Empty the Trash to delete it from your system
This step removes the main application, but there are still many files left behind on your Mac.
Step 2: Delete Hidden Folders from Library
Android Studio stores additional files in the Library folder. To remove them:
- Open Finder
- Press Command + Shift + G to open the Go to Folder box
- Type the following paths one by one and delete each folder if it exists:
~/Library/Preferences/AndroidStudio*~/Library/Application Support/Google/AndroidStudio*~/Library/Logs/AndroidStudio*~/Library/Caches/AndroidStudio*~/.android~/.gradle~/Library/Android/sdk
These folders contain the cache, SDK, emulator settings, and other configuration files.
Step 3: Use Terminal for Deep Cleanup (Optional)
If you prefer using the terminal or want to make sure everything is deleted:
- Open Terminal
- Run the following commands one by one:
bashCopyEditrm -rf ~/Library/Preferences/AndroidStudio*
rm -rf ~/Library/Application\ Support/Google/AndroidStudio*
rm -rf ~/Library/Logs/AndroidStudio*
rm -rf ~/Library/Caches/AndroidStudio*
rm -rf ~/.android
rm -rf ~/.gradle
rm -rf ~/Library/Android/sdk
Be careful while using rm -rf as it permanently deletes files.
Step 4: Verify It’s Completely Removed
To check if Android Studio is fully removed:
- Open Finder and search for Android Studio or sdk
- Make sure no related folders are left
- Restart your Mac to clear any temporary system files
After following these steps, your Mac will be free from all Android Studio files. This is useful if you are reinstalling it fresh or switching to another development tool.
How to Uninstall Android Studio in Ubuntu/Linux
If you are using Ubuntu or any other Linux-based system, you can uninstall Android Studio using the terminal. The process is simple, but to remove it completely, you also need to delete some extra files manually. These include hidden folders and SDK files that stay on your system even after uninstalling.
Step 1: Remove Android Studio Using Terminal
If you installed Android Studio using a ZIP file, you can delete the folder directly. But if you used the Snap package or another method, follow this:
For Snap users:
arduinoCopyEditsudo snap remove android-studio
If you installed it manually:
bashCopyEditrm -rf ~/android-studio
This command deletes the main Android Studio installation folder from your home directory.
Step 2: Delete Configuration Files and SDK
Android Studio creates several folders to store your configuration, SDK, and emulator settings. You should remove them, too.
Run the following commands in your terminal:
bashCopyEditrm -rf ~/.android
rm -rf ~/.gradle
rm -rf ~/.config/Google/AndroidStudio*
rm -rf ~/.cache/Google/AndroidStudio*
rm -rf ~/Android/Sdk
This step clears your emulator files, project settings, SDK manager, and other temporary data.
Step 3: Clear Hidden Folders from Home Directory
You can also use the file manager if you prefer not to use the terminal. Open your home directory, press Ctrl + H to show hidden files, and manually delete the following folders:
.android.gradle.config/Google/AndroidStudio*.cache/Google/AndroidStudio*Android/Sdk
Deleting these folders ensures that Android Studio is completely removed from your system.
Step 4: (Optional) Use Purge for Installed Packages
If you installed Android Studio using a .deb package:
arduinoCopyEditsudo apt-get remove android-studio
sudo apt-get purge android-studio
This removes the installed package and all related config files.
Final Tip:
After uninstalling, it’s a good idea to restart your system to clear any active processes or temporary files.
By following these steps, you can uninstall Android Studio completely from Ubuntu or any other Linux system. Whether you want to reinstall or switch tools, your system will now be clean and ready.
How to Uninstall Android Studio from a Laptop (General Method)
If you want to uninstall Android Studio from your laptop but you are not sure which operating system steps to follow, this general method can help you get started. It gives you a basic idea of how to remove Android Studio, no matter if you are using Windows, Mac, or Linux.
Step 1: Find and Remove the Main Application
The first step is to delete the main Android Studio program.
- On Windows, go to Control Panel > Programs > Uninstall a Program, or use the Settings > Apps section
- On Mac, open the Applications folder, right-click on Android Studio, and choose Move to Trash
- On Linux, if you installed it manually, delete the
android-studiofolder. If you used Snap, run: arduinoCopyEditsudo snap remove android-studio
This will remove the main software, but other files will remain on your system.
Step 2: Clean Leftover Files (Works for All OS)
Android Studio creates folders that store settings, cache, SDK, and emulator data. These folders are usually not removed during a simple uninstall.
Here’s where to find and delete them:
.android.gradle- Android SDK folder (usually inside your user folder or
AppDataon Windows) - Android Studio config, cache, and logs
Use your system’s file manager to find and remove them:
- On Windows, check under
C:\Users\YourName\AppData\Local,Roaming, and.android - On Mac, check
~/Libraryand your home folder - On Linux, use hidden folders in your home directory like
~/.android,~/.gradle, and~/Android/Sdk
Step 3: When to Follow OS-Specific Instructions
This general guide helps if you just want to remove Android Studio. But if you want a complete uninstall, including cleaning the system deeply, you should follow the method designed for your specific OS.
Each system has different folder structures and tools for uninstalling software. Following the right method for your OS makes sure no files are left behind.
How to Uninstall Android Studio Completely (Any OS)
If you want to uninstall Android Studio completely, that means you’re not just removing the main app. You also need to delete every file Android Studio created, including settings, SDK tools, cache, emulator data, and log files. This method works for any operating system: Windows, macOS, or Linux.
What Does “Complete Uninstall” Mean?
A normal uninstall removes only the app itself. But Android Studio stores extra data in different folders across your system. These files can take up a lot of space and may cause problems if you reinstall Android Studio later.
A complete uninstall means:
- Deleting the Android Studio software
- Removing all SDK files
- Clearing your emulator data
- Deleting logs, cache, and project settings
- Making sure your system is fully clean
Files and Folders to Delete (All OS)
Here’s a list of common folders you should delete after removing the app. These folders may look different based on your OS, but they are mostly found in your user directory.
Delete these folders if you see them:
.android– contains emulator and AVD settings.gradle– stores Gradle build settingsAndroid/Sdk– SDK tools, platforms, and build tools- Android Studio config folders:
- On Windows:
C:\Users\YourName\AppData\Local\Google\AndroidStudio*C:\Users\YourName\AppData\Roaming\Google\AndroidStudio*C:\Users\YourName\.androidC:\Users\YourName\.gradle
- On Mac:
~/Library/Preferences/AndroidStudio*~/Library/Application Support/Google/AndroidStudio*~/Library/Android/sdk~/.android,~/.gradle
- On Linux:
~/.android~/.gradle~/.config/Google/AndroidStudio*~/Android/Sdk
- On Windows:
Also delete:
.ideafolders inside your project directoriesbuildfolders inside your Android projects- Any emulator-related files (check
.android/avd)
Reboot and System Cleanup Advice
After deleting everything, it’s a good idea to restart your system. This clears any temporary files still running in the background.
You can also:
- Empty the Recycle Bin or Trash
- Use disk cleanup tools (like Windows Disk Cleanup or macOS Storage Manager)
- Clear recent items or quick access folders
Why You Should Do a Complete Uninstall
Doing a full cleanup helps you avoid problems later. If Android Studio was not working properly before, a complete uninstall lets you reinstall it fresh. It also frees up space on your system and removes any broken emulator files or SDK bugs.
If you follow all these steps, you can be sure that Android Studio is completely removed from your computer.
Unable to Uninstall Android Studio? Try These Fixes
If you’re trying to uninstall Android Studio, but it’s not working, don’t worry. Many people face this problem, especially on Windows. You might see errors, the uninstall button might do nothing, or the software might stay even after you delete it. This section will help you understand why this happens and what you can do to fix it.
Common Reasons You Can’t Uninstall Android Studio
There are a few common causes why Android Studio won’t uninstall from your system:
- Some files are still running in the background
- You don’t have the right permission to delete system files
- Antivirus or security software is blocking the uninstall process
- The uninstaller itself is broken or missing
- The installation folder was moved or renamed manually
Knowing the cause helps you choose the best method to fix it.
Fix File Permission Errors
If you see messages like “Access Denied” or “You need permission,” it means you don’t have the right to remove some files.
Here’s what you can do:
- Right-click on the Android Studio folder
- Choose Properties
- Go to the Security tab
- Click Edit and give your user account full control
- Try uninstalling again
If that doesn’t work, try running the uninstaller as an administrator:
- Right-click the uninstaller file or shortcut
- Select Run as administrator
Disable Antivirus Temporarily
Sometimes, your antivirus may stop certain uninstall actions, thinking they are unsafe. To fix this:
- Open your antivirus software
- Pause the protection or disable real-time scanning for a few minutes
- Try uninstalling Android Studio again
- Once done, turn your antivirus back on
Make sure you only disable antivirus for a short time, just while uninstalling.
Try Safe Mode or Use Revo Uninstaller (Windows)
If the normal uninstall doesn’t work, try booting into Safe Mode:
- Restart your computer
- Press the right key (usually F8 or Shift + Restart) to enter Safe Mode
- Once in Safe Mode, try uninstalling Android Studio again
If you still can’t remove it, use a free tool like Revo Uninstaller. It forces removal and also deletes leftover files and registry entries.
Steps with Revo Uninstaller:
- Download and install Revo Uninstaller
- Open it and select Android Studio from the list
- Click Uninstall and choose Advanced Scan
- It will delete all related files and registry entries
Final Tip
After uninstalling, reboot your system. This helps reset your computer and clear any locked files that were in use.
If you follow these steps, you should be able to uninstall Android Studio even if it’s giving you problems.
How to Uninstall System Apps from Android (Extra Help)
If you are trying to uninstall system apps from your Android phone, you should first understand that system apps are not like regular apps. These apps are built into your phone by the manufacturer or your mobile company, and Android doesn’t allow you to remove them easily.
Difference Between User Apps and System Apps
User apps are the ones you install yourself from the Google Play Store or other sources. These apps can be uninstalled anytime with just a few taps.
System apps are the default apps that come with your phone, like:
- Phone
- Messages
- Google Chrome
- YouTube
- Weather or file manager apps from the brand (like Samsung or Xiaomi)
These are often required by the system to work properly. That’s why you can’t uninstall them like normal apps.
Why System Apps Can’t Be Removed Normally
Android protects system apps for two reasons:
- Stability – Removing them might break core features or make your phone unstable
- Security – Some apps are required for system updates or phone security
So when you try to uninstall them, the option is either missing or blocked.
Options to Remove System Apps (Advanced Users)
If you want to remove them, there are two technical methods:
- Using ADB (Android Debug Bridge)
- You don’t need to root your phone
- Requires a computer and some commands
- You can uninstall system apps without fully deleting them from the device
- Risk: If you remove an important app, it might cause problems
Basic steps:
- Enable Developer Mode and USB Debugging on your phone
- Connect your phone to the PC
- Use ADB command like: cssCopyEdit
adb shell pm uninstall -k --user 0 package.name.here
You will need to know the exact package name of the app.
- Rooting Your Phone
- Gives full control over your system
- Allows you to delete anything, including system apps
- Not recommended for beginners
- Risk: It voids your warranty and may damage your phone if done wrong
You should only do this if you understand the process and know how to fix problems if something goes wrong.
A Safer Option: Disable Instead of Uninstall
If you don’t use a system app but want to hide it or stop it from running:
- Go to Settings > Apps
- Find the app you don’t want
- Tap Disable
This won’t uninstall the app, but it will stop it from running and remove it from the home screen and app drawer. It also frees up some memory.
Final Tip
Unless you know what you’re doing, it’s better to disable system apps instead of removing them. Uninstalling system apps is possible, but it comes with risks. Always back up your data and research before taking such steps.
FAQs
When you’re uninstalling Android Studio, you might have a few questions in mind. These are some of the most common ones people ask, and here are the answers in simple words to help you understand clearly.
Can I reinstall Android Studio after uninstalling it?
Yes, you can reinstall Android Studio anytime. Many developers uninstall it to fix problems or to start fresh. Just download the latest version from the official Android Studio website and install it again. If you did a complete uninstall before, it will be like a brand new setup.
Will uninstalling Android Studio delete my projects?
No, uninstalling Android Studio does not automatically delete your saved projects. Your projects are usually saved in a different folder, like in your Documents or a custom location. But to be safe, you should back them up before uninstalling, especially if you’re removing related folders like .android or .gradle.
Do I need to uninstall Java SDK separately?
If you installed the Java SDK (JDK) separately, it won’t be removed when you uninstall Android Studio. You can leave it installed if you plan to use it with other tools or reinstall Android Studio later. But if you no longer need it, you can uninstall it manually from your system’s settings.
Is it safe to delete the .android and .gradle folders?
Yes, it’s safe to delete the .android and .gradle folders if you’re doing a full uninstall. These folders store temporary files, emulator settings, and build data. Deleting them won’t harm your computer. They will be created again if you install Android Studio later. Just make sure you don’t have any important emulator snapshots or settings saved in them.
These answers should help you feel more confident about uninstalling Android Studio and cleaning your system without losing your important data.
Final Thoughts
Uninstalling Android Studio might seem like a simple task, but if you want to do it the right way, you need to follow the correct method for your system. Each operating system stores files in different locations, so removing only the main app doesn’t always clean everything.
If you’re using Windows 11, make sure you remove the program from the settings and also delete all leftover folders like .android, .gradle, and the SDK. For Mac, just dragging the app to the trash is not enough—you should also clear hidden folders from the Library. On Ubuntu or Linux, you can use terminal commands to remove Android Studio and then manually delete all config and SDK folders.
We also looked at how to uninstall system apps from Android, which is a different process. System apps are protected, so it’s better to disable them unless you know how to use ADB or root access.
If you plan to reinstall Android Studio, doing a complete uninstall is a smart move. It helps you avoid errors from old settings or broken SDK files and gives you a clean setup.
Make sure you follow the step-by-step guide for your operating system to avoid missing any important files. Cleaning up properly will also help free up space and improve performance.
If you found this guide helpful, bookmark it so you can come back to it later. You can also share it with others who might need help removing Android Studio from their system.

Charles Mata is an experienced app developer and educator, passionate about helping others build powerful mobile applications. He publishes in-depth guides on app development, covering Android Studio, Firebase, Google Play Console, and more. With a practical approach, he simplifies complex coding concepts, making them easy for beginners and advanced developers alike.
Charles also offers a premium website development course, where he teaches step-by-step strategies to build, optimize, and scale websites for success. Whether you’re a beginner looking to learn app development or an entrepreneur wanting to create a website, his expert insights will guide you every step of the way.

